How to deploy your site on Netlify? 
@Netlify is a great platform to deploy your satic website, like for example a blog or a personal website. They offer a generous free tier and many advanced features if needed.
A thread on how to deploy your website

@Netlify is a great platform to deploy your satic website, like for example a blog or a personal website. They offer a generous free tier and many advanced features if needed.
A thread on how to deploy your website

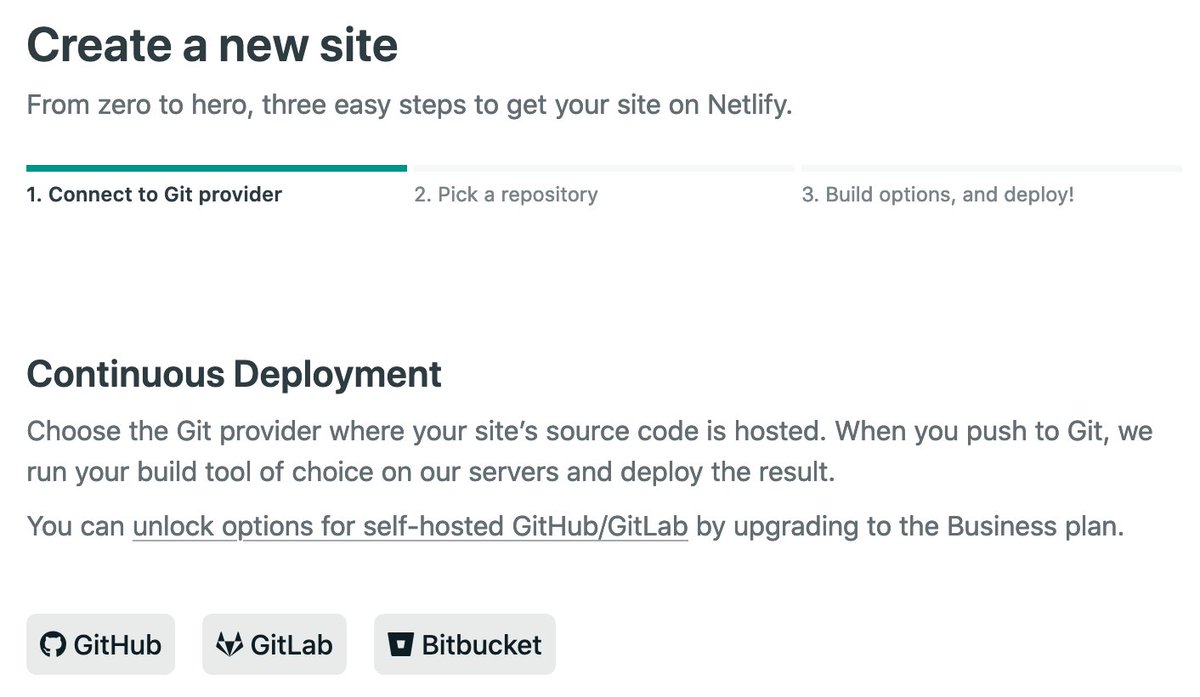
1. Connect to your repository 
After you create a Netlify account you first need to connect to your Git repository. Netlify supports GitHub, Gitlab and BitBucket and even self-hosted GitHub instances.

After you create a Netlify account you first need to connect to your Git repository. Netlify supports GitHub, Gitlab and BitBucket and even self-hosted GitHub instances.
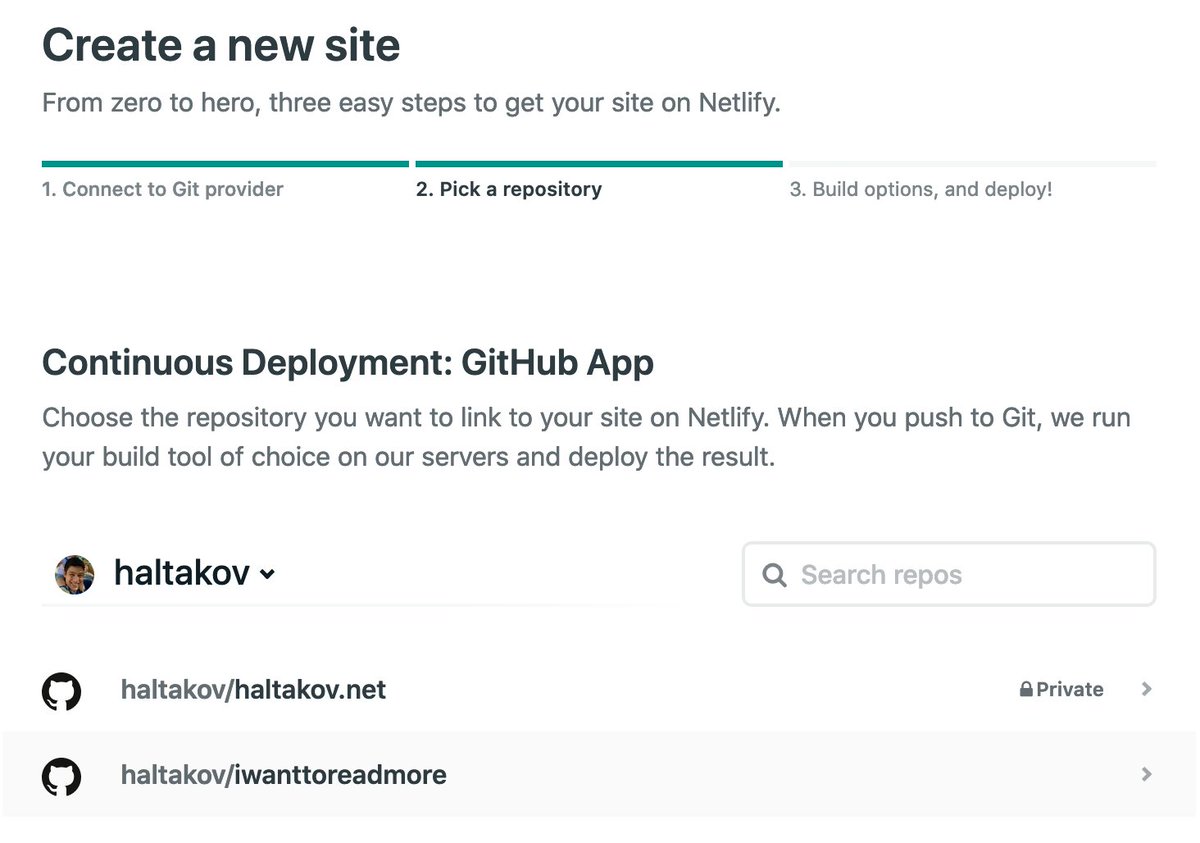
2. Choose your repository 
Choose the repository that contains your website. You man need to configure the Netlify app on GitHub if you don't see all your repositories. Use the link on the form to go to the settings page.

Choose the repository that contains your website. You man need to configure the Netlify app on GitHub if you don't see all your repositories. Use the link on the form to go to the settings page.
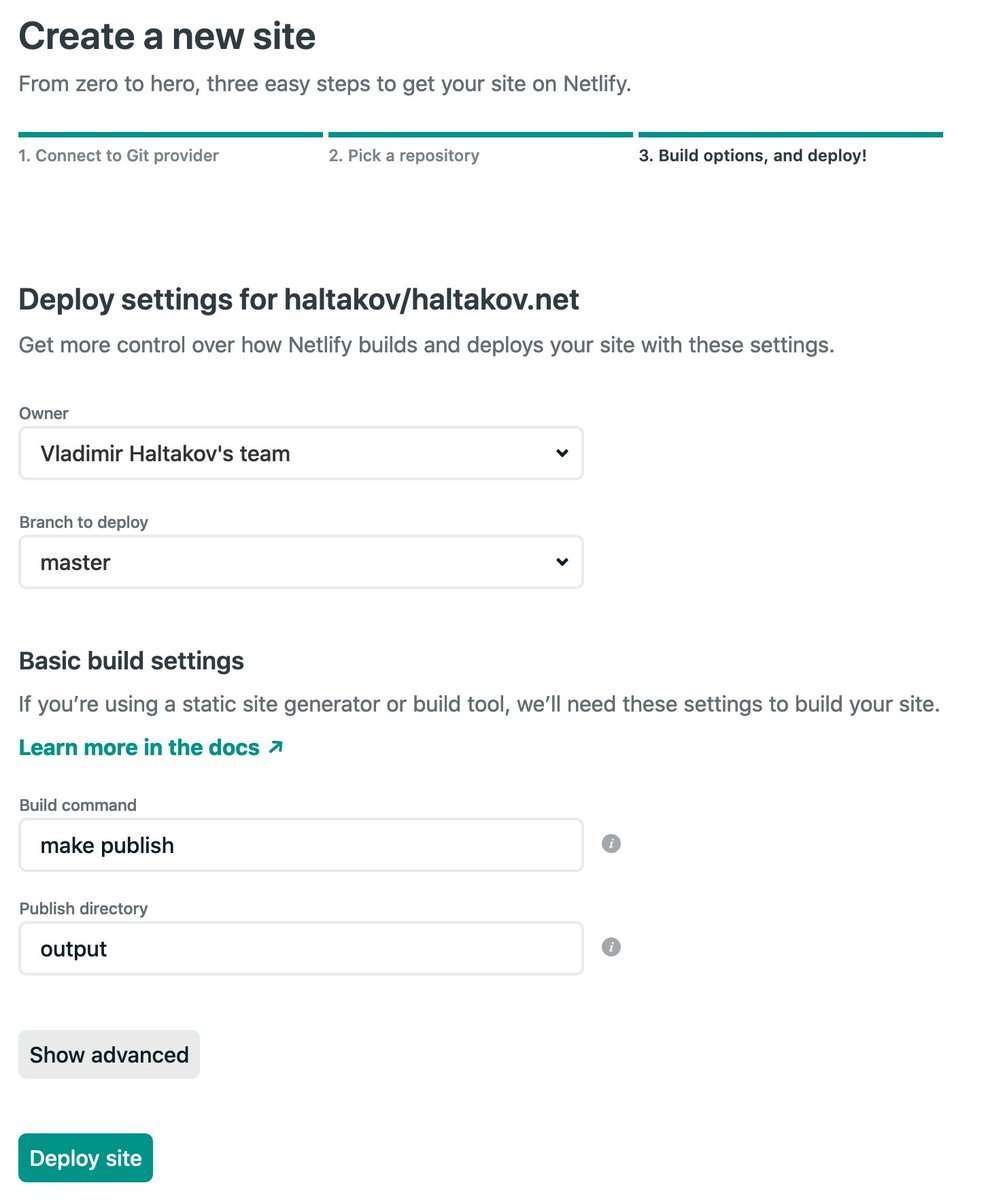
3. Configure your build options 
If you just have your HTML, CSS and JavaScript in your repository you can just hit Deploy.
If you are using a static site generator, you need to specify your build command and output directory. Here an example using @getpelican.

If you just have your HTML, CSS and JavaScript in your repository you can just hit Deploy.
If you are using a static site generator, you need to specify your build command and output directory. Here an example using @getpelican.
4. Use your own domain name 
You can now visit your website on a http://netlify.app subdomain, but you probably want to use your own domain name. You can configure it under Settings → Domain Management. Follow to docs for your domain registrar.

You can now visit your website on a http://netlify.app subdomain, but you probably want to use your own domain name. You can configure it under Settings → Domain Management. Follow to docs for your domain registrar.
That's it - you have your fully functioning website now! 
Every time you push a change to your repository your website will be deployed automatically.
You can also create branches and pull requests and you will be able to preview the changes as well, before deploying them.

Every time you push a change to your repository your website will be deployed automatically.
You can also create branches and pull requests and you will be able to preview the changes as well, before deploying them.
If you want to read more about how to create a static website with a blog using Pelican, check out this thread: https://twitter.com/haltakov/status/1301746349814185986?s=20

 Read on Twitter


