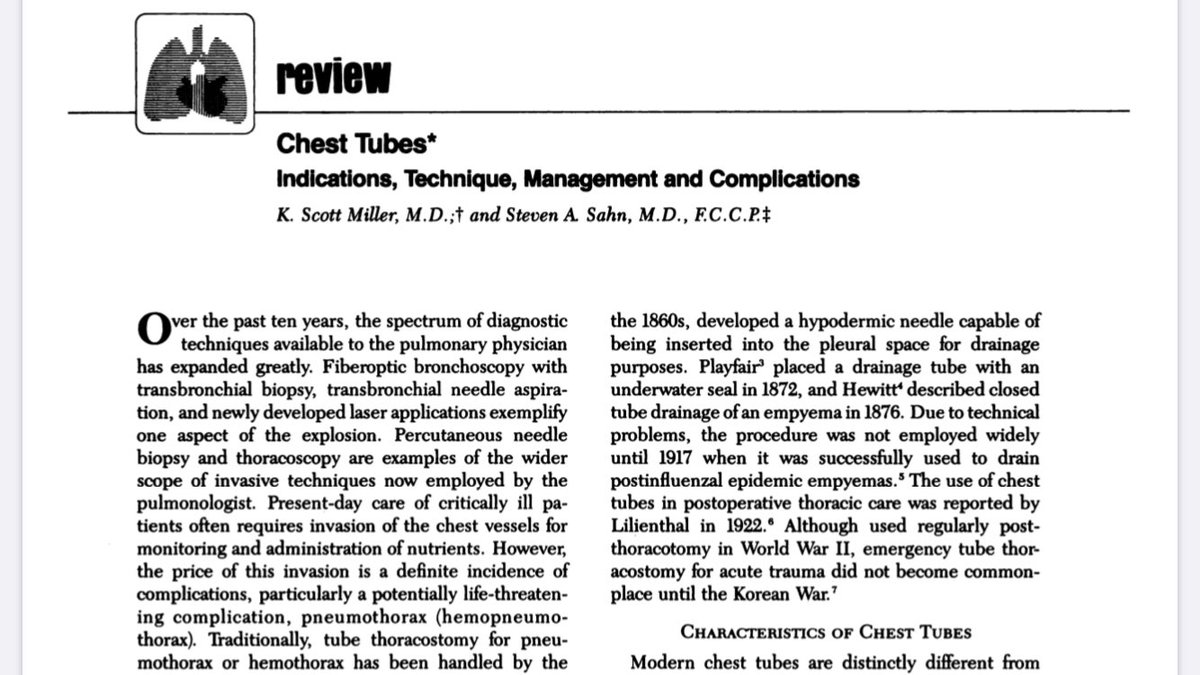
When I was a third year resident, an attending gave me this review paper from 1987.
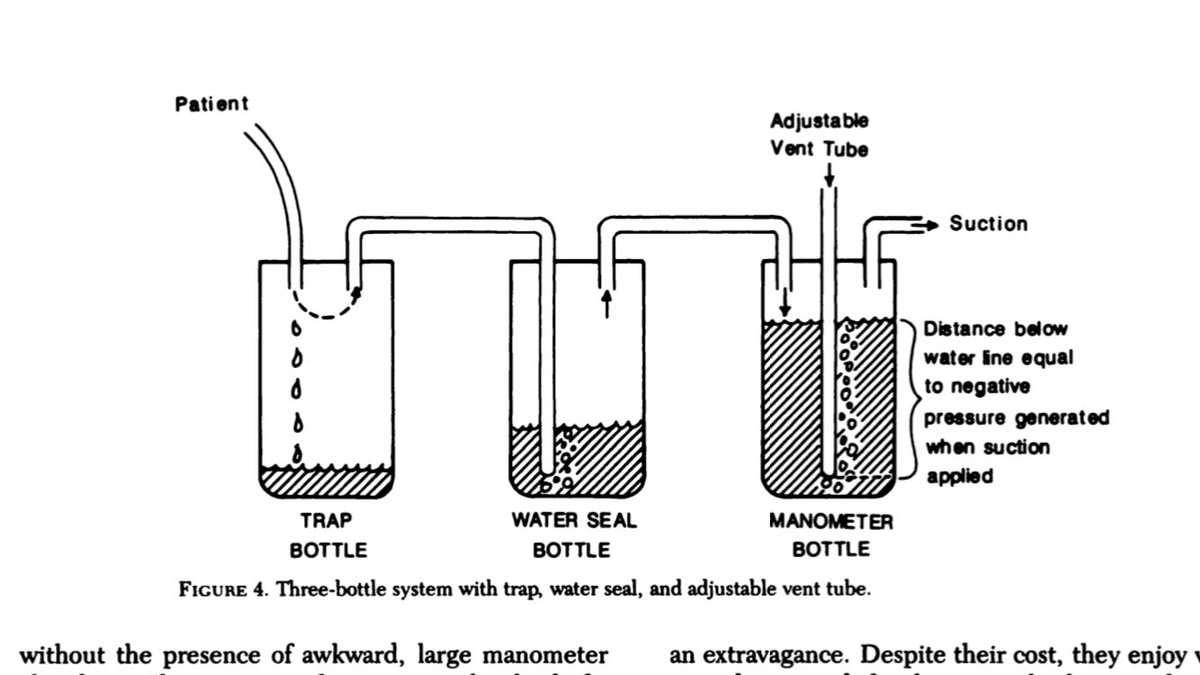
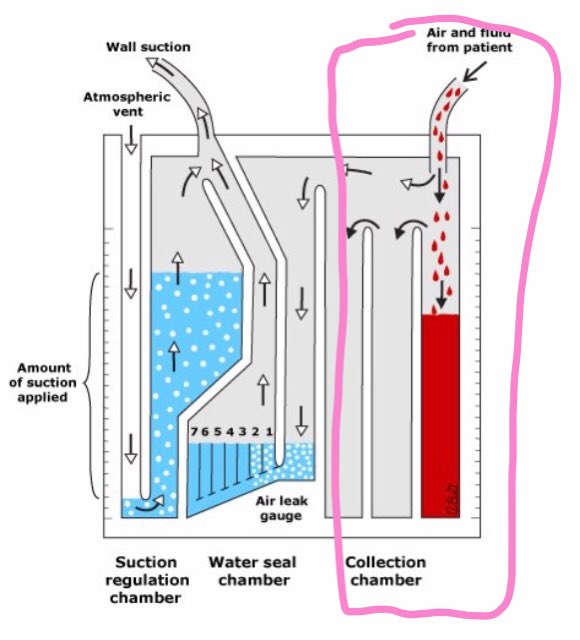
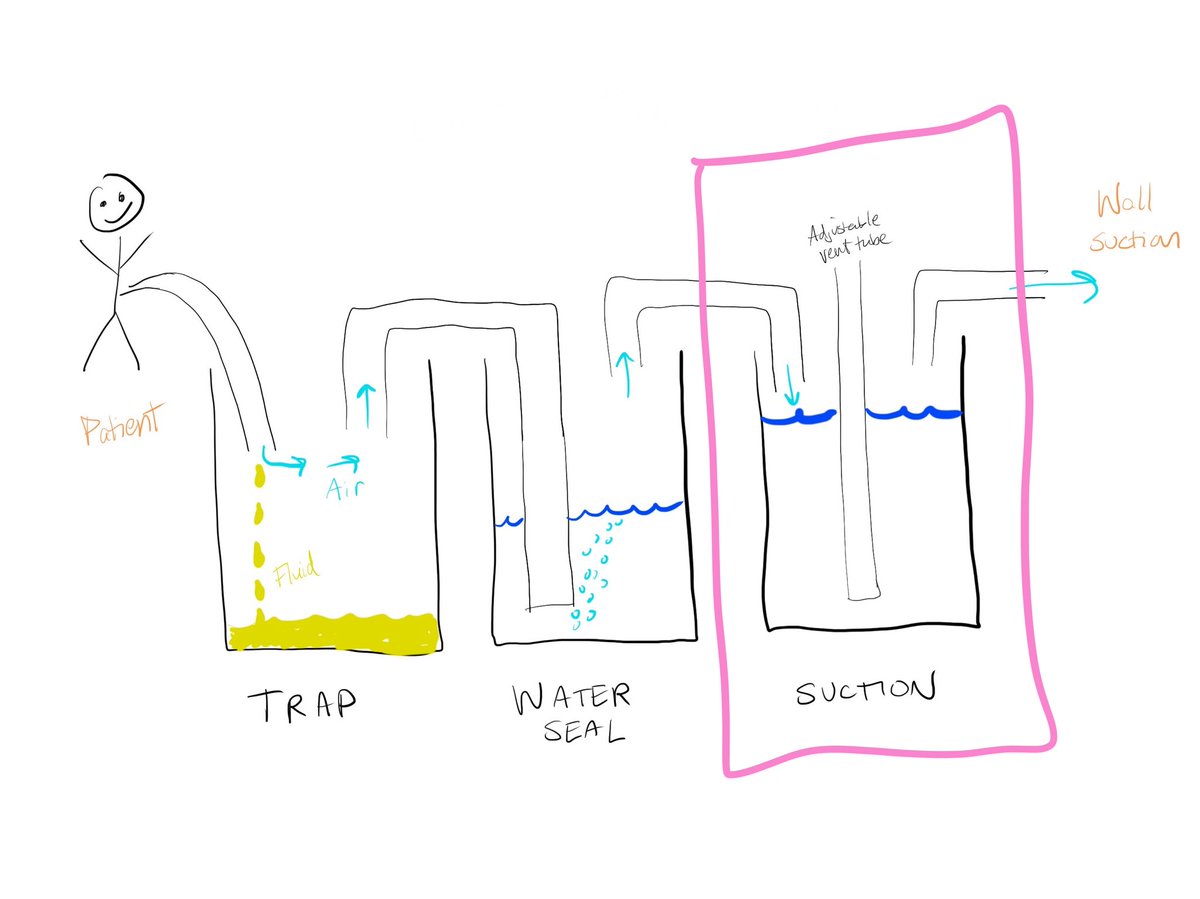
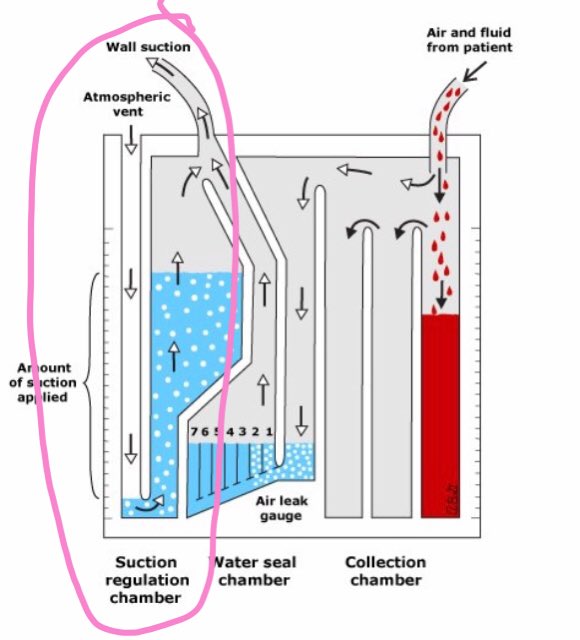
Lots of stuff is outdated in it, but it has this image of a three bottle system that is really helpful.
Lots of stuff is outdated in it, but it has this image of a three bottle system that is really helpful.
The usual indications for a chest tube involve either air or fluid/blood in the pleural space. The tube is placed between the ribs and into the space, and is then connected to an atrium (our mystery box).
Side note, see this thread by @laxswamy for how to place a pigtail. https://twitter.com/laxswamy/status/1062843462083661824
Back to our box.
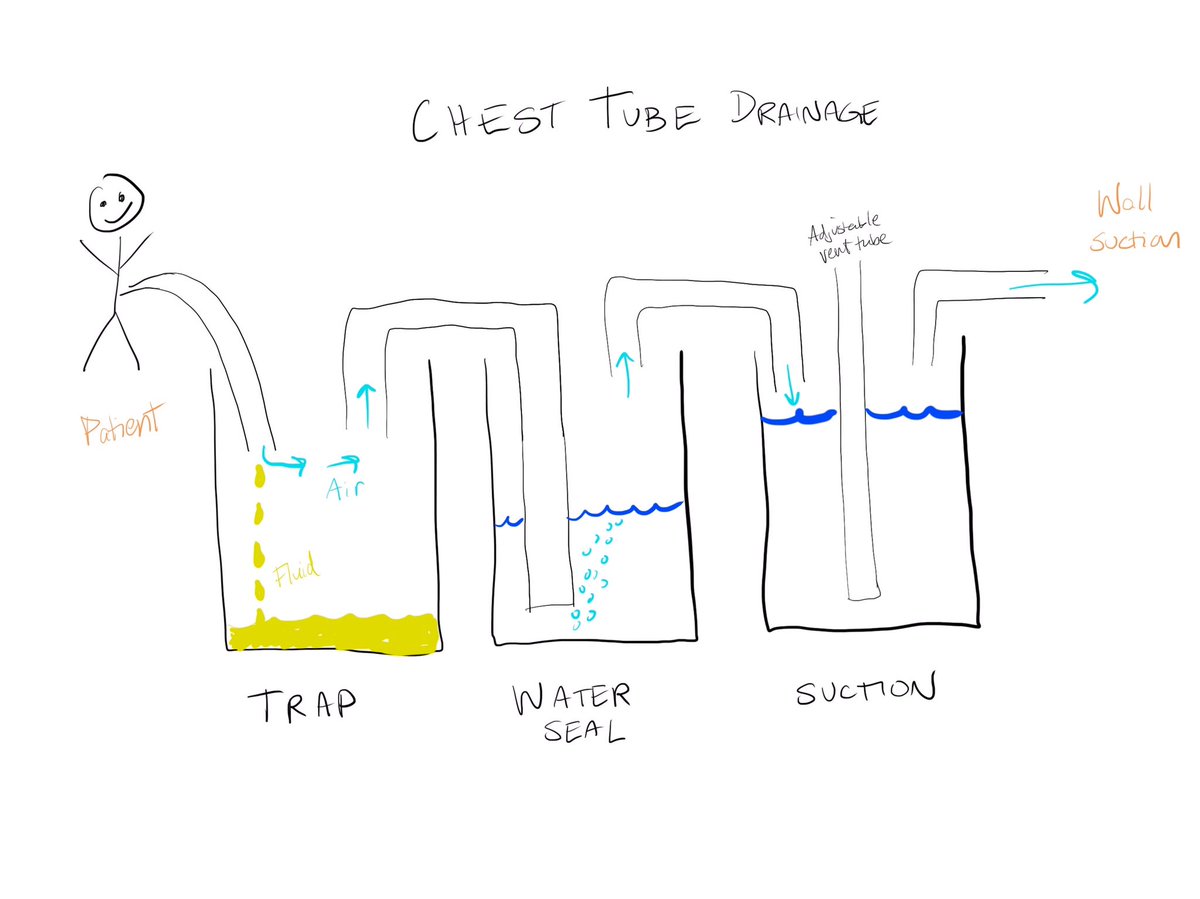
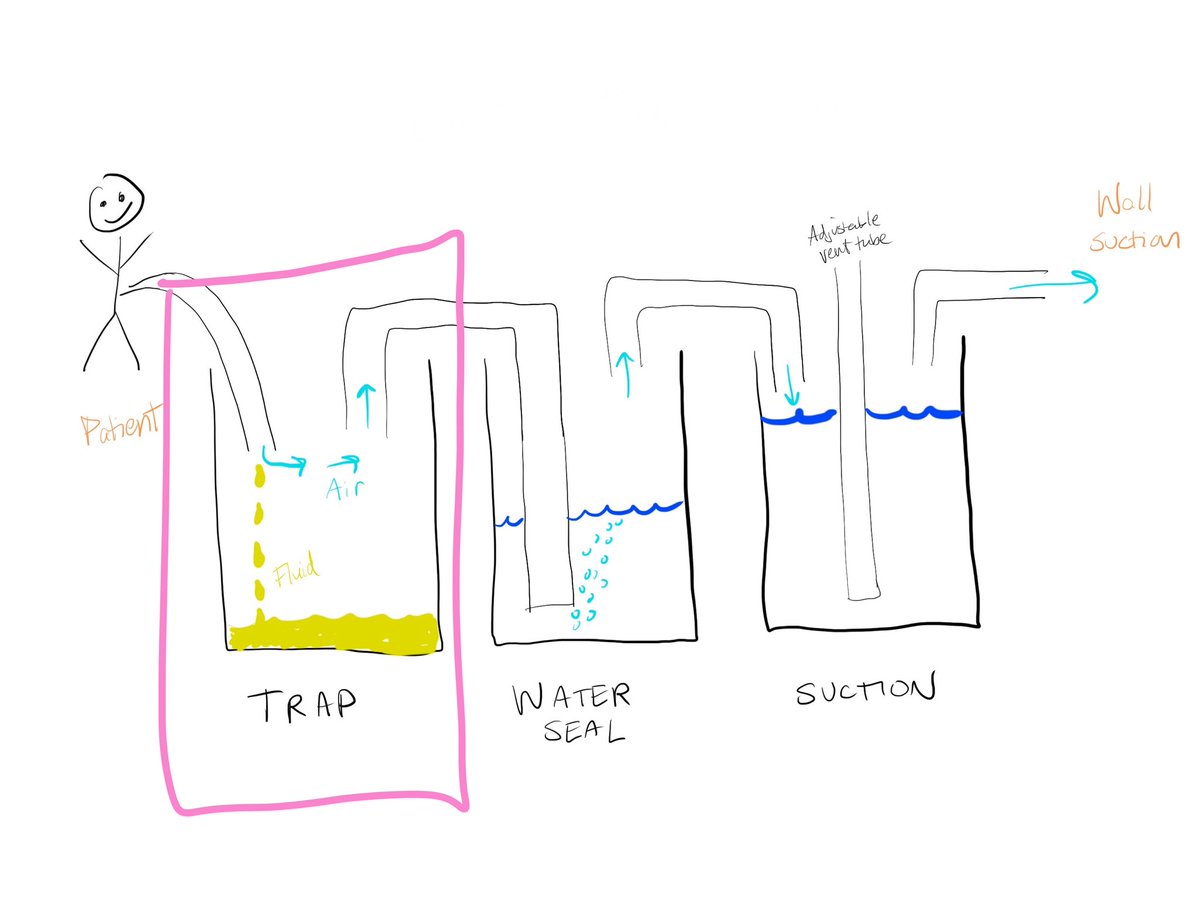
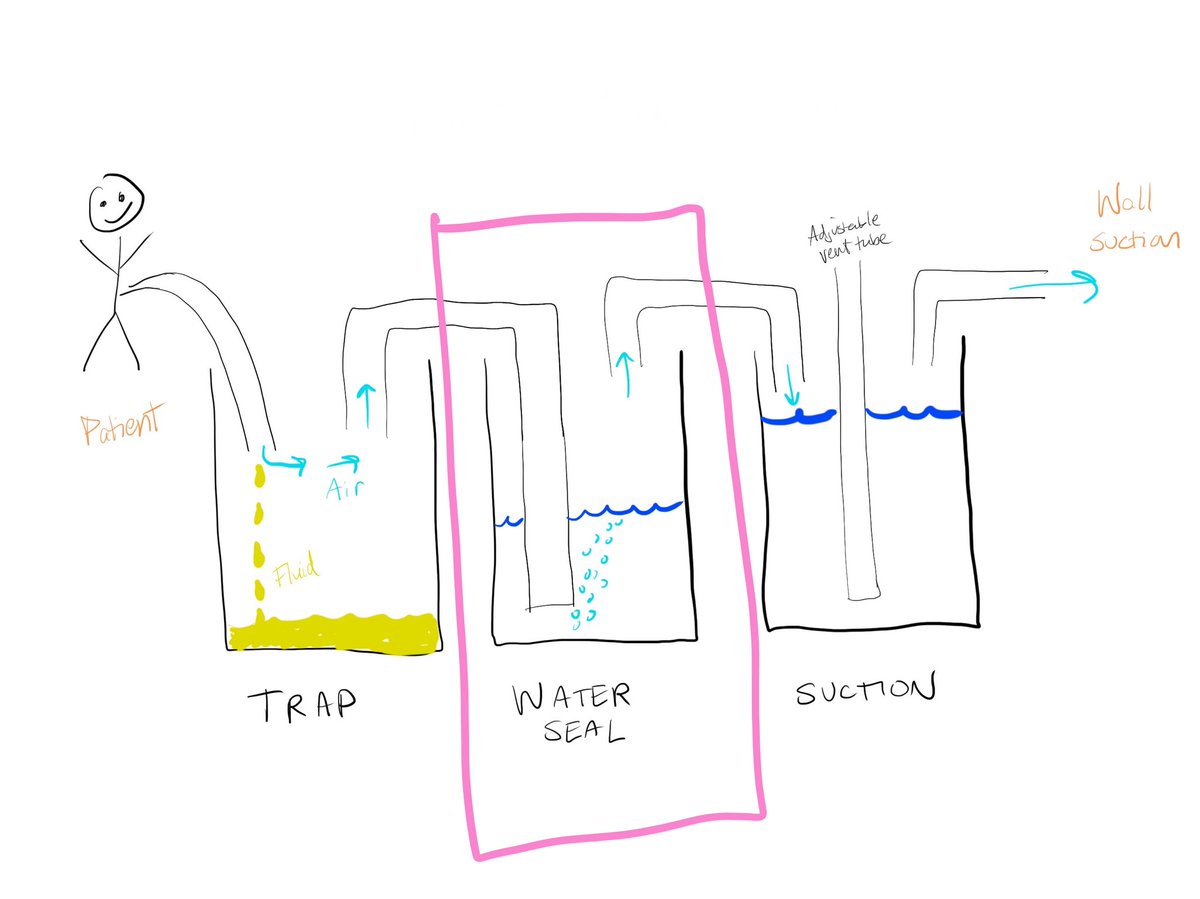
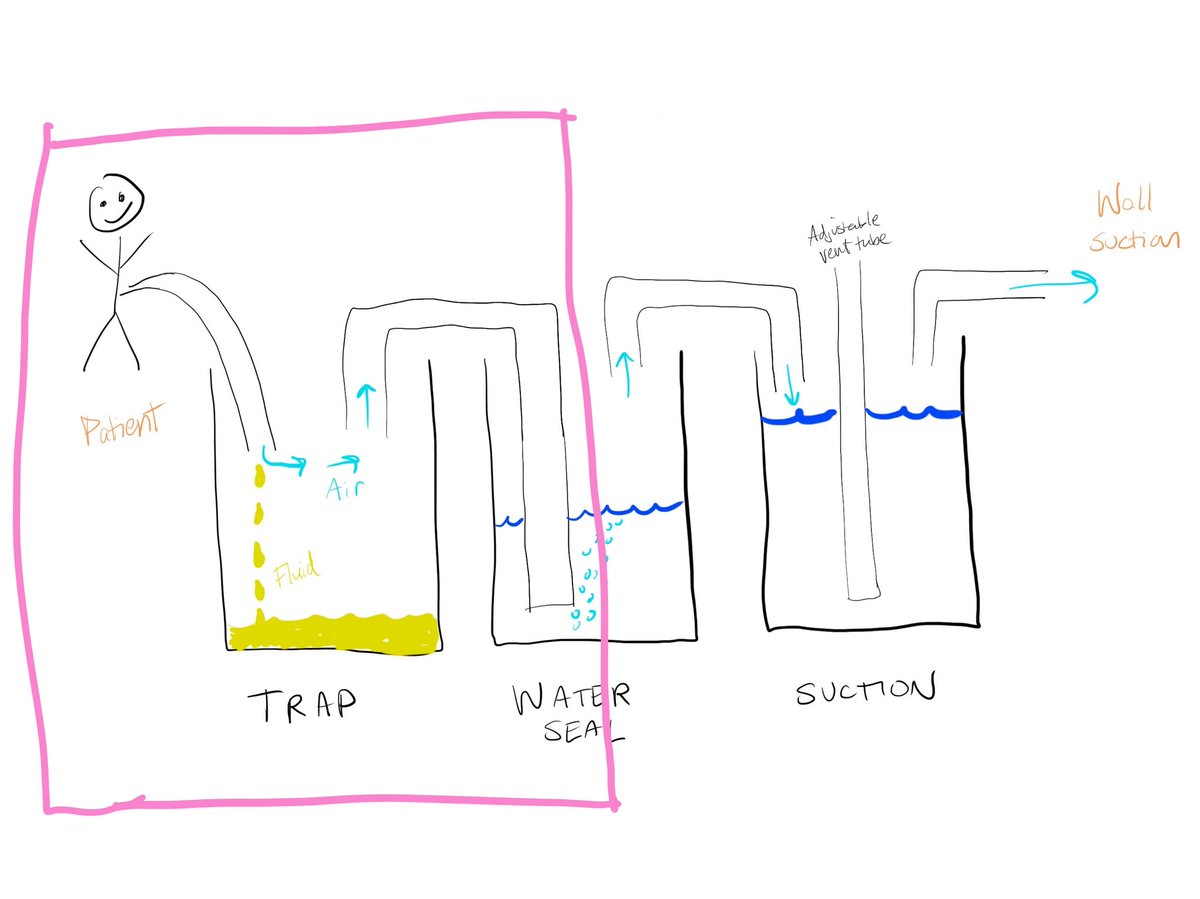
Our atrium is essentially a three chamber system. First you have your trap. Fluid and air drain from the patient into this chamber.
Our atrium is essentially a three chamber system. First you have your trap. Fluid and air drain from the patient into this chamber.
Next is the water seal. This allows air to escape from our trap chamber, but doesn’t allow it to flow backwards into the trap or the patient.
When you have the tube on water seal, you are essentially just using the first two chambers with no suction.
For example, a patient has a tube placed for a pneumothorax, and it has been to suction.
The pneumo has resolved on XR and they are ready for a trial of water seal.
The pneumo has resolved on XR and they are ready for a trial of water seal.
You unplug the suction tubing.
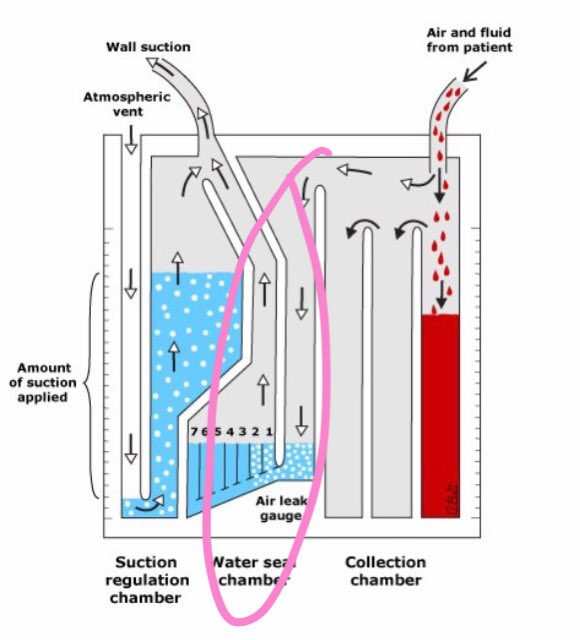
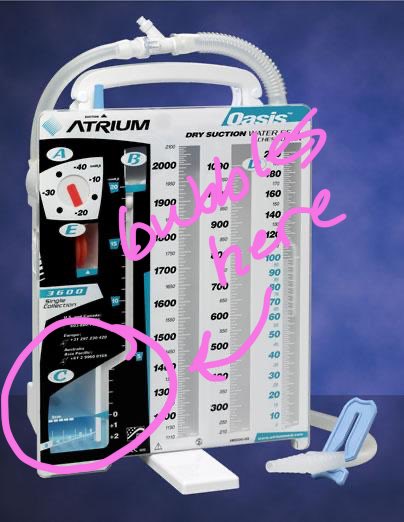
You’ll be able to see bubbles in the water chamber if they continue to have an air leak. They shouldn’t develop tension, because air can escape through that water valve.
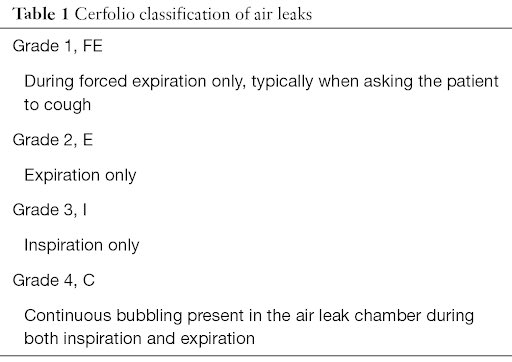
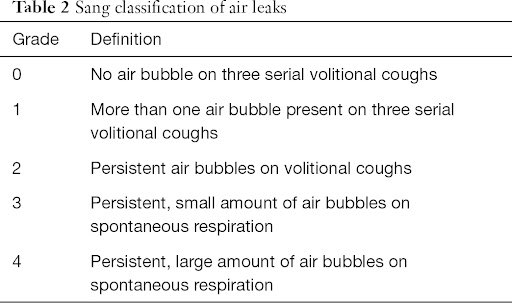
You can grade the leak, which can be helpful when communicating with a team.
You’ll be able to see bubbles in the water chamber if they continue to have an air leak. They shouldn’t develop tension, because air can escape through that water valve.
You can grade the leak, which can be helpful when communicating with a team.
Speaking of suction, that’s our last chamber shown here.
This allows you to actively suck air or fluid out, rather than relying on gravity or pressure within the pleural space for evacuation.
This allows you to actively suck air or fluid out, rather than relying on gravity or pressure within the pleural space for evacuation.
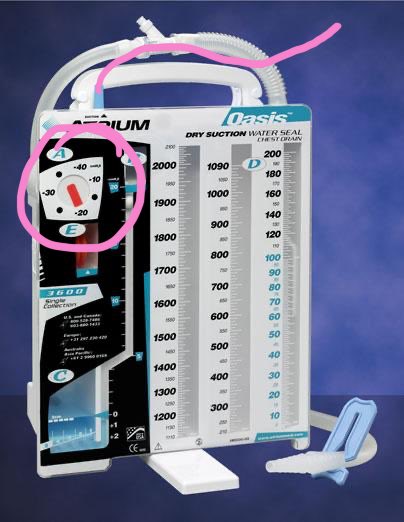
The suction tubing plugs in to the top as drawn here. The degree of suction is controlled by the dial on the left (NOT by the number on the wall suction).
Pneumos are often left to suction to help approximate the pleura if the leak is large, the patient is on positive pressure, or it didn’t resolve on water seal. You will also see pneumos left to water seal, as we mentioned above. Many will also clamp before removing the tube.
Effusions are usually on suction unless you are trying to minimize amount out, like if you were concerned for reexpsnsion pulmonary edema. In that case, you would clamp it.
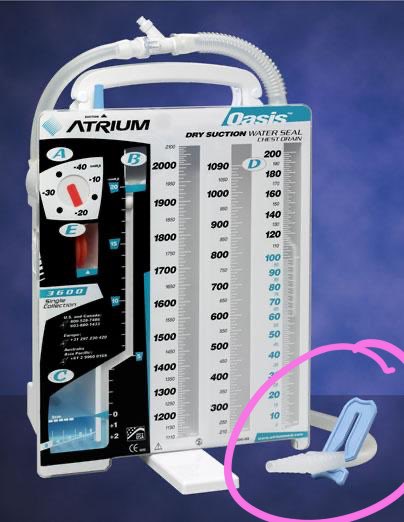
You can clamp it here with the blue clamp, or you can “clamp it” at the stopcock.
You can clamp it here with the blue clamp, or you can “clamp it” at the stopcock.
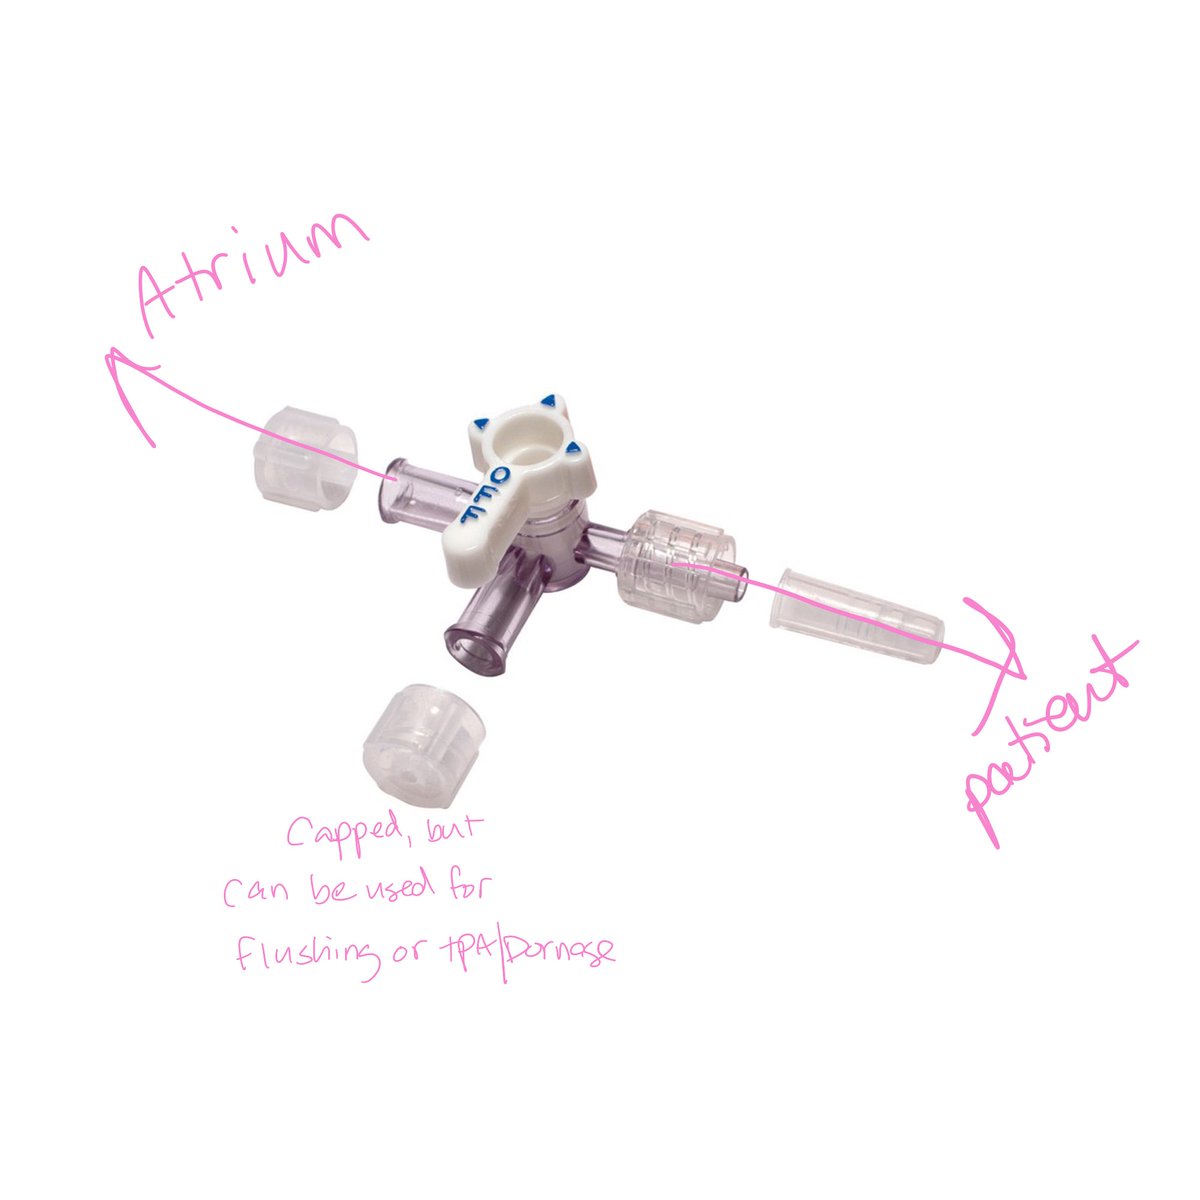
Speaking of stopcocks, stopcock physiology is the hardest part of chest tubes starting out (unless you have a background like nursing where you used them frequently).
You will usually see a three way on a pigtail (if placed by pulm, anyways).
You will usually see a three way on a pigtail (if placed by pulm, anyways).
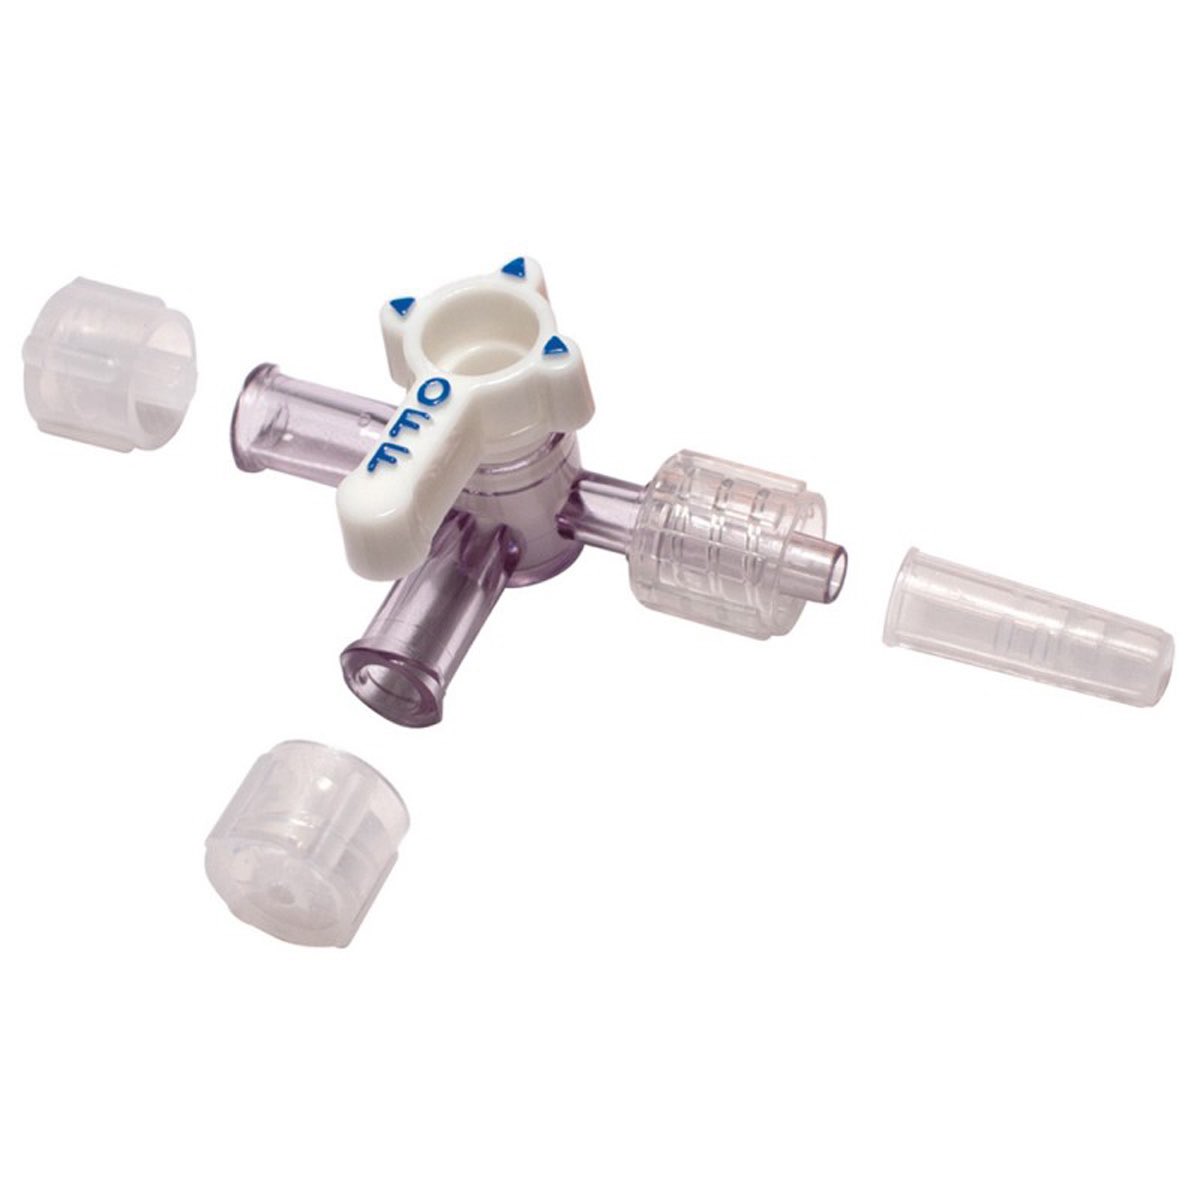
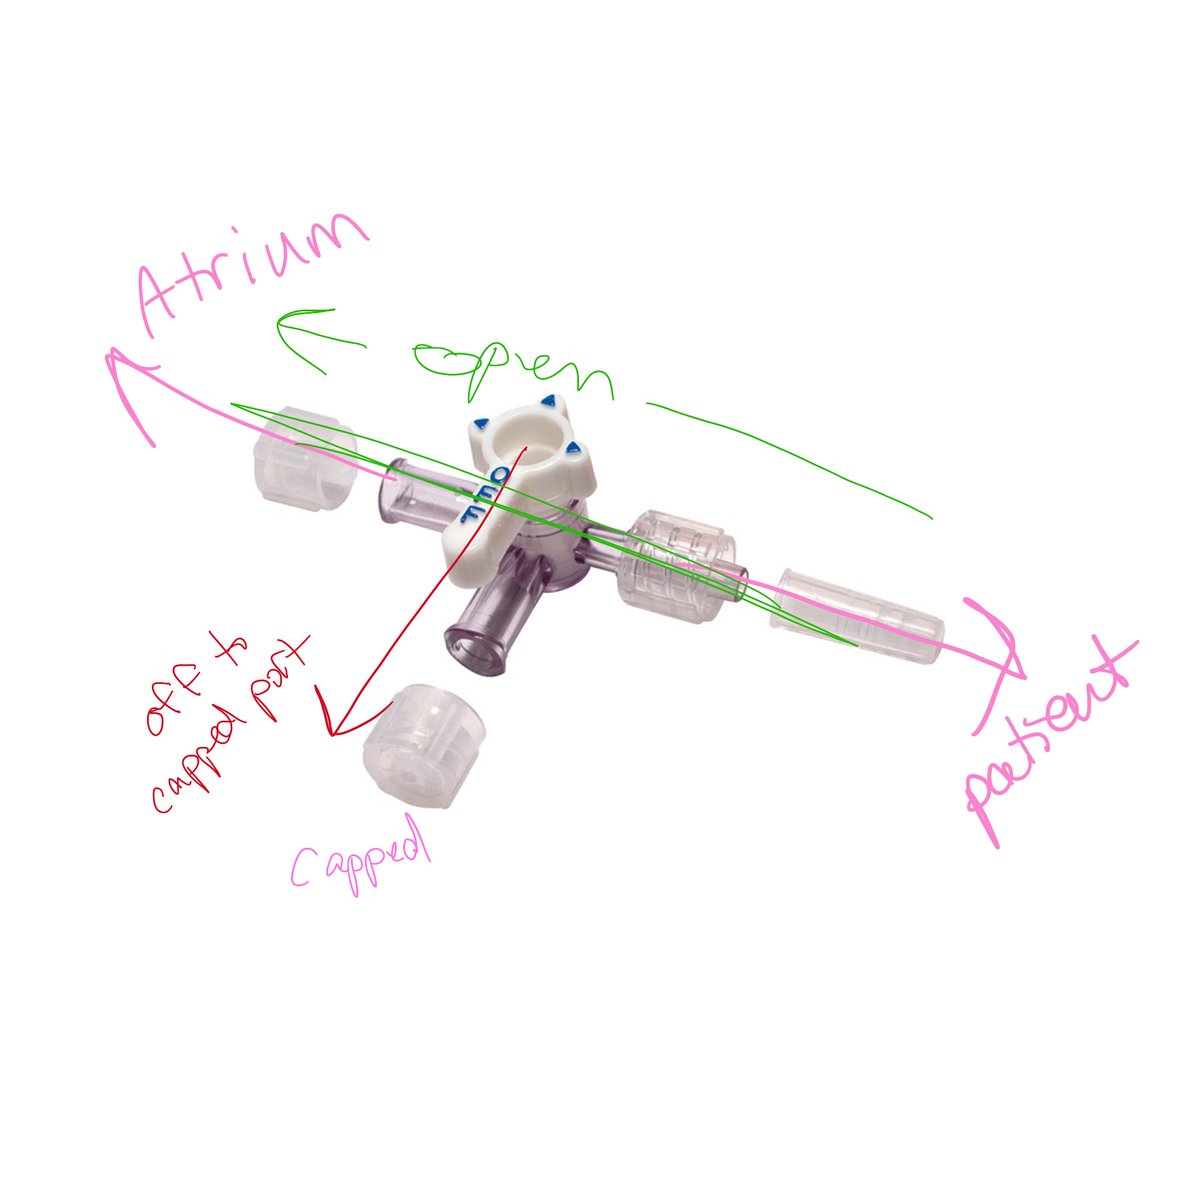
One port connects to the tubing from the patient, the opposite side goes to your drainage, and the third can be used for taking samples, flushing, or instilling tpa/dornase. It stays capped when it is not in use.
When you turn the indicator towards a port, it is off to that port.
For an open, draining chest tube your indicator would be pointed to your capped port.
If you wanted to “clamp” it here, you would turn it towards the patient.
For an open, draining chest tube your indicator would be pointed to your capped port.
If you wanted to “clamp” it here, you would turn it towards the patient.
Look for tidaling fluid moving back and forth in the circuit with respiration) to confirm that your tube is open, patent, and draining.
Last pearl—pulling a pigtail.
Supplies: suture removal kit, Vaseline gauze, 4x4s, and tegaderm.
Make your dressing by putting the Vaseline gauze on a few 4x4s.
Cut your sutures.
Get your dressing ready to cover the hole. Hold it right by your tube.
Supplies: suture removal kit, Vaseline gauze, 4x4s, and tegaderm.
Make your dressing by putting the Vaseline gauze on a few 4x4s.
Cut your sutures.
Get your dressing ready to cover the hole. Hold it right by your tube.
Grab the tube with the other hand.
I ask the patient to hum on the count of 3, and to not stop until I tell them.
After they start humming, I pull fast & immediately cover with the occlusive dressing. Then top with a tegaderm.
Don’t forget to tell them they can stop humming.
I ask the patient to hum on the count of 3, and to not stop until I tell them.
After they start humming, I pull fast & immediately cover with the occlusive dressing. Then top with a tegaderm.
Don’t forget to tell them they can stop humming.
And that’s what I know about chest tube drainage.

 Read on Twitter
